Comment faire du kimchi maison : la recette complète
⚠️ Avis éditorial : Cet article est rédigé à titre informatif et ne remplace pas l’avis d’un professionnel de santé. Les informations sur la fermentation et les probiotiques sont issues de sources scientifiques référencées. Consultez un médecin ou un diététicien avant de modifier significativement votre alimentation.
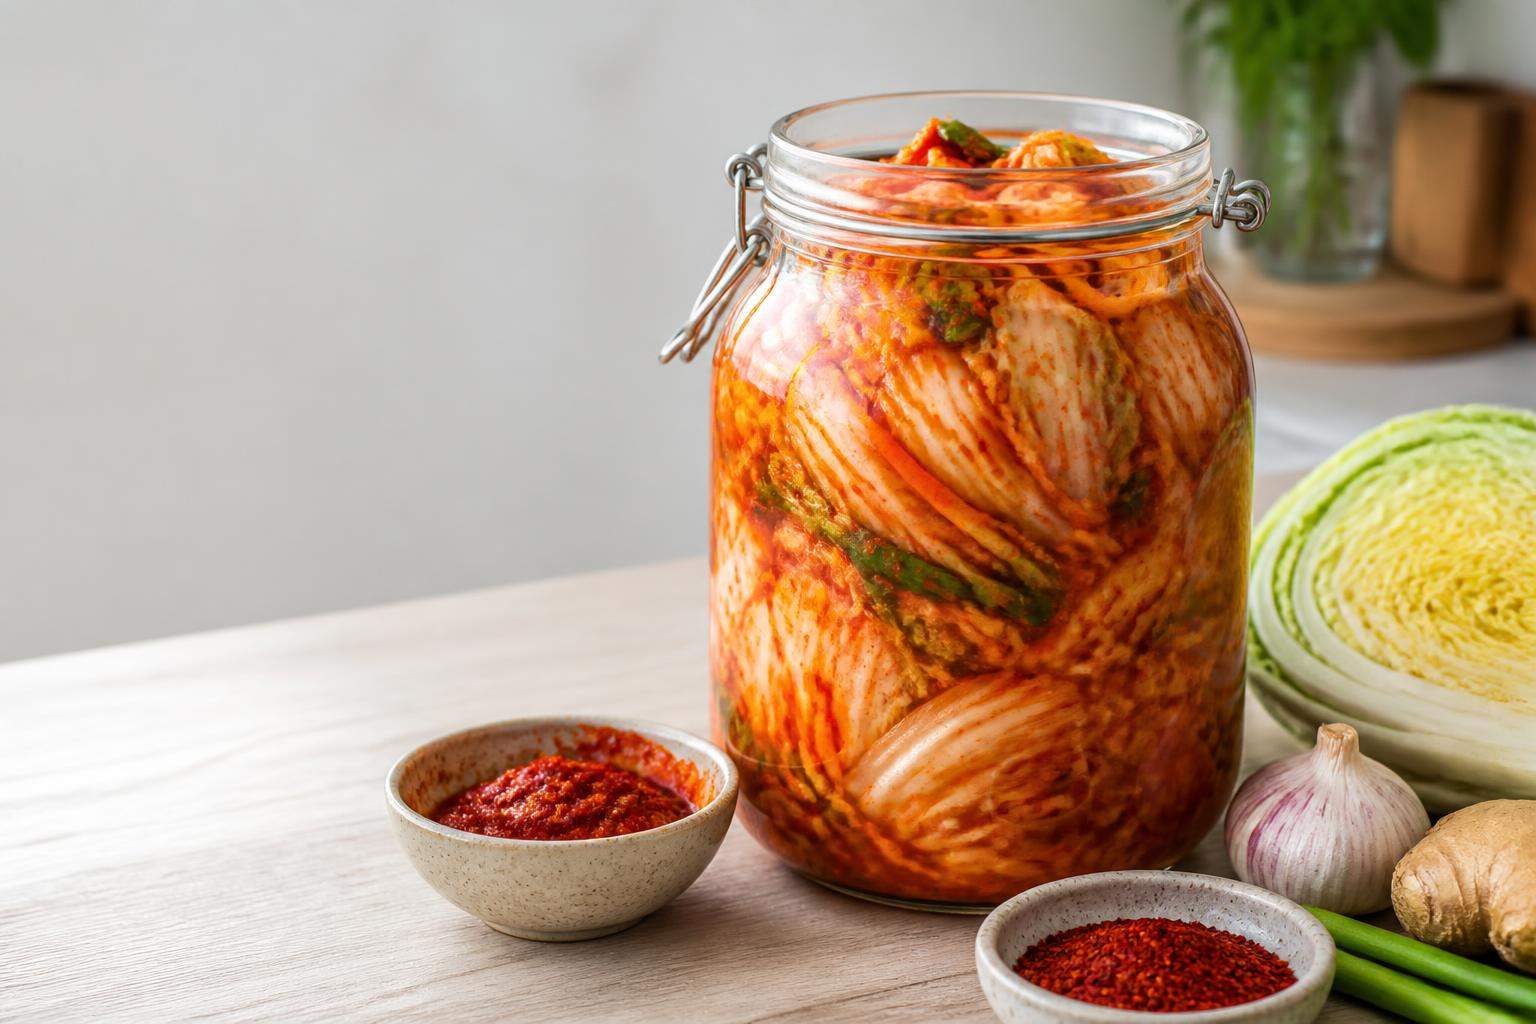
Comment faire du kimchi : mélangez du chou napa salé avec une pâte épicée à base de gochugaru, d’ail, de gingembre et de sauce de poisson, puis laissez fermenter à température ambiante pendant 1 à 5 jours avant de réfrigérer.
Une étude publiée dans le Journal of Ethnic Foods () [1] recense plus de 200 variétés de kimchi en Corée, toutes reposant sur le même principe de lacto-fermentation. Ce processus génère des milliards de bactéries bénéfiques pour le microbiote intestinal.
- ✔ Riche en probiotiques vivants après fermentation
- ✔ Source de vitamines C, K et B12
- ✔ Faible en calories : environ 15 kcal pour 100 g
- ✔ Propriétés anti-inflammatoires documentées scientifiquement
- ✔ Préparation maison accessible en moins de 2 heures actives
Qu’est-ce que le kimchi et pourquoi le faire soi-même ?
Le kimchi est un condiment coréen fermenté à base de légumes, principalement du chou napa, assaisonnés d’épices et de sel. Sa préparation maison vous garantit un produit vivant, sans conservateurs ni additifs. Découvrez tout ce qu’il faut savoir sur le kimchi pour comprendre ses origines et ses propriétés.
Le kimchi artisanal contient des souches de bactéries lactiques absentes des versions pasteurisées du commerce. Selon une étude publiée dans Food Microbiology () [2], la pasteurisation détruit jusqu’à 90 % de ces micro-organismes bénéfiques.
Faire son kimchi maison, c’est aussi maîtriser le niveau de piquant, la texture et le degré de fermentation selon vos préférences. C’est économique, écologique et nutritionnellement supérieur.
Les 10 ingrédients essentiels pour faire du kimchi authentique
Pour comment faire du kimchi de façon authentique, voici la liste des ingrédients pour environ 1 kg de kimchi fini :
- Chou napa (baechu) : 1 kg — la base incontournable
- Gros sel non iodé : 60 g — pour le salage initial
- Gochugaru : 3 à 5 cuillères à soupe — piment coréen en flocons, indispensable
- Ail : 6 gousses — finement râpé ou pressé
- Gingembre frais : 1 cuillère à café — râpé
- Sauce de poisson (ou sauce soja pour version vegan) : 2 cuillères à soupe
- Daïkon (radis blanc coréen) : 150 g — râpé en julienne
- Oignons verts (ciboule) : 4 tiges — coupées en tronçons de 3 cm
- Farine de riz gluant : 1 cuillère à soupe — pour la bouillie de base
- Sucre : 1 cuillère à café — pour activer la fermentation
Le gochugaru est l’ingrédient le plus difficile à substituer. Il donne au kimchi sa couleur rouge caractéristique et son profil aromatique unique. On le trouve en épiceries asiatiques ou en ligne.
Le matériel nécessaire avant de commencer
Avant de vous lancer dans comment faire du kimchi maison, rassemblez ce matériel :
- Un grand saladier en inox ou en verre (évitez le plastique poreux)
- Des gants en latex ou nitrile (le gochugaru tache durablement)
- Un bocal en verre hermétique d’au moins 1,5 litre
- Une râpe à légumes ou un robot culinaire
- Une balance de cuisine
- Une passoire
Le bocal en verre est préférable au plastique : il ne retient pas les odeurs et ne libère pas de composés chimiques lors de la fermentation acide. Stérilisez-le à l’eau bouillante avant utilisation.
Étape 1 : Saler et préparer le chou napa
La première étape pour comment faire du kimchi est le salage du chou, qui peut durer de 2 à 24 heures selon la méthode choisie. Voici comment procéder :
- Coupez le chou napa en quatre dans le sens de la longueur, puis en morceaux de 4 à 5 cm.
- Placez les morceaux dans un grand saladier et saupoudrez le sel entre chaque couche.
- Massez le chou avec les mains pendant 5 minutes pour commencer à libérer l’eau.
- Laissez reposer 1 à 2 heures à température ambiante (ou jusqu’à 12 heures pour une texture plus fondante).
- Rincez abondamment sous l’eau froide (2 à 3 fois) pour éliminer l’excès de sel.
- Essorez bien et laissez égoutter dans une passoire pendant 15 minutes.
Le chou doit être souple mais pas mou. Si vous pouvez plier une feuille sans qu’elle se casse, le salage est parfait. Cette étape crée l’environnement osmotique qui favorisera la lacto-fermentation.
Étape 2 : Préparer la pâte épicée (yangnyeom)
Le cœur du savoir-faire sur comment faire du kimchi réside dans la préparation du yangnyeom, la pâte assaisonnée. Voici les sous-étapes :
- Dans une petite casserole, mélangez 120 ml d’eau froide et la farine de riz gluant.
- Chauffez à feu moyen en remuant constamment jusqu’à obtenir une bouillie épaisse et translucide (environ 3 minutes).
- Ajoutez le sucre, mélangez et laissez refroidir complètement.
- Dans un grand bol, combinez la bouillie refroidie, le gochugaru, l’ail râpé, le gingembre, et la sauce de poisson.
- Mélangez jusqu’à obtenir une pâte homogène de couleur rouge vif.
La bouillie de riz joue un rôle crucial : elle sert de substrat aux bactéries lactiques et aide la pâte à adhérer aux feuilles de chou. Sans elle, la fermentation est moins uniforme et le kimchi moins savoureux.
Étape 3 : Assembler et mélanger tous les ingrédients
C’est l’étape la plus tactile de comment faire du kimchi. Enfilez vos gants et procédez ainsi :
- Ajoutez le daïkon râpé et les oignons verts à la pâte épicée.
- Incorporez le chou égoutté dans le bol avec la pâte.
- Malaxez énergiquement avec les mains pour enrober chaque morceau de chou uniformément.
- Goûtez et ajustez le sel ou le piment selon votre préférence.
Le mélange doit être généreux : chaque feuille de chou doit être enrobée de pâte rouge sur toutes ses faces. C’est ce contact intime entre les légumes et la pâte qui assure une fermentation homogène et un kimchi savoureux.
Étape 4 : La fermentation, clé de comment faire du kimchi réussi
La fermentation est l’étape qui transforme votre préparation en véritable kimchi vivant. Voici comment maîtriser ce processus :
- Tassez le kimchi dans votre bocal stérilisé en pressant fermement pour éliminer les bulles d’air.
- Laissez 2 à 3 cm d’espace en haut du bocal (le kimchi gonfle en fermentant).
- Fermez le couvercle sans trop serrer pour permettre aux gaz de s’échapper.
- Laissez fermenter à température ambiante (18 à 22°C) pendant 1 à 5 jours.
- Ouvrez le bocal une fois par jour pour tasser le kimchi et laisser les gaz s’échapper.
- Goûtez chaque jour : quand l’acidité vous convient, placez au réfrigérateur.
Selon une étude publiée dans LWT – Food Science and Technology () [3], la concentration en bactéries lactiques atteint son pic entre le 2ème et le 4ème jour de fermentation à 20°C, avec des valeurs dépassant 10⁸ UFC/g. C’est à ce stade que les bénéfices probiotiques sont maximaux.
En savoir plus sur les légumes lacto-fermentés et leurs bienfaits pour comprendre la science derrière ce processus fascinant.
Guide de fermentation : temps, température et résultats
Ce tableau vous aidera à adapter la fermentation de votre kimchi selon vos préférences de goût :
| Durée de fermentation | Température | Profil de goût | Concentration en probiotiques | Recommandé pour |
|---|---|---|---|---|
| 12 à 24 heures | 20-22°C | Frais, peu acide, piquant dominant | 10⁵ à 10⁶ UFC/g | Débutants, préférence pour le croquant |
| 2 à 3 jours | 20-22°C | Légèrement acide, équilibré | 10⁷ à 10⁸ UFC/g | La plupart des palais, usage quotidien |
| 4 à 5 jours | 20-22°C | Bien acide, saveurs complexes | 10⁸ UFC/g (pic) | Amateurs de kimchi traditionnel |
| 1 à 4 semaines | 4°C (réfrigérateur) | Très acide, umami prononcé | Maintenu à 10⁷ à 10⁸ UFC/g | Cuisson, soupe kimchi (kimchi jjigae) |
Conservation et durée de vie du kimchi maison
Une fois au réfrigérateur, votre kimchi continue de fermenter lentement. Voici ce qu’il faut savoir sur la conservation :
- Durée de conservation : 3 à 6 mois au réfrigérateur dans un bocal hermétique
- Kimchi jeune (geotjeori) : à consommer dans les 2 premières semaines pour la fraîcheur
- Kimchi mûr (mukeunji) : après 1 mois, idéal pour la cuisine (soupes, riz sauté)
- Signe de problème : moisissures visibles (blanches ou colorées) — jetez si présentes
- Odeur normale : acide et piquante — une odeur putride signale un problème
Toujours utiliser une cuillère propre pour prélever du kimchi. Ne jamais introduire d’ustensiles souillés dans le bocal, ce qui pourrait contaminer l’ensemble de la préparation.
5 variantes populaires pour varier comment faire du kimchi
Maîtriser comment faire du kimchi de base ouvre la porte à de nombreuses variantes :
- Kkakdugi : kimchi de radis daïkon coupé en cubes, plus croquant et plus rapide à préparer
- Oi sobagi : kimchi de concombre farci, prêt en 2 heures seulement
- Kimchi vegan (chaesik kimchi) : remplacez la sauce de poisson par de la sauce soja ou de la pâte de miso
- Baek kimchi : kimchi blanc sans gochugaru, idéal pour les enfants ou les palais sensibles
- Kimchi de chou-fleur : adaptation occidentale utilisant du chou-fleur à la place du chou napa
Consultez notre article sur les bienfaits scientifiquement prouvés du kimchi pour comprendre pourquoi ces variantes sont toutes bénéfiques pour la santé.
Les bienfaits scientifiques du kimchi maison
Savoir comment faire du kimchi maison, c’est aussi comprendre pourquoi ce condiment mérite une place dans votre alimentation quotidienne. Les preuves scientifiques sont solides :
- Santé intestinale : les souches de Lactobacillus kimchii et Leuconostoc mesenteroides améliorent la diversité du microbiote [1]
- Immunité : une étude de publiée dans Nutrients montre une réduction des marqueurs inflammatoires après 4 semaines de consommation régulière [4]
- Gestion du poids : le kimchi est associé à une réduction de l’IMC dans plusieurs études épidémiologiques coréennes
- Santé cardiovasculaire : les composés bioactifs du gingembre et de l’ail réduisent le cholestérol LDL
- Propriétés antioxydantes : le gochugaru est riche en capsaïcine et en vitamine C
Découvrez comment les probiotiques naturels comme ceux du kimchi soutiennent votre flore intestinale et contribuent à votre santé globale.
7 erreurs à éviter quand on apprend comment faire du kimchi
Même les cuisiniers expérimentés font ces erreurs lorsqu’ils apprennent comment faire du kimchi pour la première fois :
- Utiliser du sel iodé : l’iode inhibe les bactéries lactiques et compromet la fermentation
- Ne pas rincer suffisamment le chou : un excès de sel rend le kimchi immangeable
- Remplir le bocal à ras bord : le kimchi gonfle et déborde, créant un désordre et une pression excessive
- Fermentation trop chaude : au-dessus de 25°C, des bactéries indésirables peuvent proliférer
- Substituer le gochugaru par du paprika : le profil aromatique est complètement différent
- Ouvrir le bocal trop souvent : chaque ouverture introduit de l’oxygène qui peut favoriser les moisissures
- Goûter avec des ustensiles sales : risque de contamination croisée
Comment faire du kimchi vegan : la version sans produits animaux
La version vegan de comment faire du kimchi est tout aussi savoureuse et nutritive. Voici les substitutions clés :
- Sauce de poisson → sauce soja tamari : même quantité, profil umami similaire
- Sauce de poisson → pâte de miso diluée : 1 cuillère à soupe de miso + 1 cuillère d’eau
- Crevettes fermentées → algues kombu : pour l’umami marin
- Ajout optionnel : levure nutritionnelle pour renforcer la saveur umami
Selon l’ANSES () [5], les aliments fermentés à base végétale constituent une excellente source de probiotiques dans le cadre d’une alimentation végétarienne ou végane équilibrée.
Découvrez tous les aliments probiotiques naturels pour diversifier vos sources de bactéries bénéfiques au-delà du kimchi.
Comment utiliser votre kimchi maison en cuisine
Une fois que vous maîtrisez comment faire du kimchi, voici comment l’intégrer à votre cuisine quotidienne :
- En accompagnement direct : avec du riz blanc, des nouilles ou des grillades
- Kimchi jjigae (soupe) : kimchi mûr + tofu + porc ou thon en conserve + bouillon
- Kimchi bokkeumbap (riz sauté) : riz froid + kimchi haché + œuf au plat
- Pancakes au kimchi (kimchijeon) : kimchi haché dans une pâte à crêpes épaisse
- Sandwich ou burger : remplace la choucroute pour une touche asiatique
- Vinaigrette : kimchi mixé avec de l’huile de sésame pour une sauce originale
De nombreux lecteurs nous signalent qu’une fois qu’ils ont appris comment faire du kimchi maison, ils ne peuvent plus se passer de cette préparation dans leur cuisine quotidienne, notamment pour relever des plats simples comme les œufs brouillés ou les sandwichs.
Ce que la science dit vraiment sur comment faire du kimchi optimal
La recherche scientifique sur comment faire du kimchi de façon optimale est active. Voici les enseignements clés :
- Une concentration en sel de 2 à 3% favorise la croissance des bactéries lactiques tout en inhibant les pathogènes
- La température idéale de fermentation se situe entre 4°C et 20°C selon la durée souhaitée
- L’ajout de farine de riz augmente la production d’acide lactique de 30% selon une étude de Food Chemistry () [3]
- Le gochugaru contient de la capsaïcine qui possède des propriétés antimicrobiennes sélectives, favorisant les bonnes bactéries
- La fermentation à basse température (4-10°C) produit un kimchi plus complexe aromatiquement mais nécessite 2 à 4 semaines
- Savoir comment faire du kimchi commence par choisir du sel non iodé et du gochugaru authentique : ces deux ingrédients sont non négociables pour une fermentation réussie.
- La maîtrise de comment faire du kimchi passe par le contrôle du temps de salage : 2 heures minimum, 12 heures pour une texture optimale.
- Pour réussir comment faire du kimchi fermenté, goûtez chaque jour et réfrigérez dès que l’acidité vous convient, entre le 2ème et le 5ème jour.
- La version vegan de comment faire du kimchi est tout aussi efficace nutritionnellement : remplacez simplement la sauce de poisson par de la sauce soja tamari.
- Apprendre comment faire du kimchi maison vous permet d’obtenir jusqu’à 10⁸ UFC/g de probiotiques vivants, contre quasi zéro dans les versions pasteurisées du commerce.
Questions fréquentes sur comment faire du kimchi
Combien de temps faut-il pour faire du kimchi ?
La préparation active de comment faire du kimchi prend environ 1 à 2 heures. Le salage du chou nécessite 2 à 12 heures supplémentaires. La fermentation à température ambiante dure ensuite 1 à 5 jours selon votre préférence d’acidité.
Peut-on faire du kimchi sans gochugaru ?
Techniquement oui, mais le résultat sera très différent. Le gochugaru donne au kimchi sa couleur rouge, sa saveur fumée et ses propriétés antimicrobiennes spécifiques. Le paprika doux peut être utilisé en dépannage, mais le profil aromatique sera nettement moins authentique.
Comment faire du kimchi moins piquant ?
Réduisez la quantité de gochugaru à 1 à 2 cuillères à soupe au lieu de 3 à 5. Vous pouvez aussi opter pour le baek kimchi (kimchi blanc) qui n’utilise pas de piment du tout. L’acidité de la fermentation reste présente et agréable même sans piment.
Est-ce que le kimchi maison peut être dangereux ?
La lacto-fermentation est un processus naturellement sûr. L’acidité produite inhibe les bactéries pathogènes. Le risque principal est la contamination par des moisissures si le kimchi n’est pas correctement immergé dans sa saumure. En cas de moisissures visibles, jetez le bocal entier.
Quelle est la différence entre kimchi jeune et kimchi mûr ?
Le kimchi jeune (geotjeori) est croquant, frais et peu acide. Le kimchi mûr (mukeunji), fermenté plus longtemps, est plus acide, plus mou et développe des saveurs umami complexes. Les deux sont nutritionnellement excellents, mais le kimchi mûr est préféré pour la cuisine chaude.
Comment savoir si mon kimchi a bien fermenté ?
Trois signes indiquent une fermentation réussie : la présence de petites bulles dans le bocal, une odeur acide et piquante caractéristique, et un goût légèrement acidulé au palais. Si vous ouvrez le bocal et entendez un léger « pschitt », c’est bon signe.
Peut-on faire du kimchi avec du chou vert ordinaire ?
Oui, mais la texture sera différente. Le chou napa (baechu) a des feuilles plus tendres et une teneur en eau plus élevée qui favorise la fermentation. Le chou vert ordinaire donnera un kimchi plus ferme et moins juteux. La fermentation reste possible mais le résultat s’éloigne du kimchi traditionnel.
Comment faire du kimchi sans sauce de poisson pour les végétariens ?
Remplacez la sauce de poisson par une quantité égale de sauce soja tamari (sans gluten si nécessaire) ou par une pâte de miso diluée. Pour l’umami marin, ajoutez une petite algue kombu séchée dans le bocal pendant la fermentation, à retirer avant consommation.
Combien de temps se conserve le kimchi maison au réfrigérateur ?
Le kimchi maison se conserve de 3 à 6 mois au réfrigérateur dans un bocal hermétique. Il continue de fermenter lentement, devenant progressivement plus acide. Après 6 mois, il reste consommable mais son acidité peut être très prononcée, ce qui le rend idéal pour la cuisine plutôt que la dégustation directe.
Faut-il stériliser les bocaux pour faire du kimchi ?
Une stérilisation à l’eau bouillante est recommandée mais pas strictement obligatoire. Un bocal propre lavé au lave-vaisselle à haute température suffit généralement. L’acidité de la fermentation créera rapidement un environnement hostile aux contaminants indésirables.
Peut-on congeler le kimchi maison ?
La congélation est possible mais détruit une grande partie des bactéries probiotiques vivantes. Le kimchi congelé reste savoureux pour la cuisine (soupes, riz sauté) mais perd ses bénéfices probiotiques. La réfrigération est toujours préférable pour conserver les propriétés nutritionnelles.
Comment faire du kimchi avec moins de sel ?
Réduire le sel en dessous de 2% du poids du chou risque de compromettre la sécurité alimentaire et la fermentation. Si vous surveillez votre apport en sodium, rincez plus abondamment le chou après salage et consommez le kimchi en petites quantités. Une portion de 50 g contient environ 300 mg de sodium.
Ce qu’il faut retenir
Maîtriser comment faire du kimchi maison est plus simple qu’il n’y paraît. Quatre étapes suffisent : saler le chou, préparer la pâte épicée, mélanger, et laisser fermenter. Le résultat est un aliment vivant, riche en probiotiques, en vitamines et en composés bioactifs que vous ne trouverez dans aucun kimchi pasteurisé du commerce.
Comprendre comment faire du kimchi vous permet aussi d’adapter la recette à vos préférences et contraintes alimentaires, qu’il s’agisse d’une version vegan, moins piquante ou à base d’autres légumes. C’est un savoir-faire culinaire qui enrichit votre alimentation à long terme.
Action concrète : Commencez par une petite quantité, 500 g de chou napa, pour votre premier essai. Goûtez chaque jour pendant la fermentation et notez vos préférences. Vous affinerez votre recette personnelle en deux ou trois préparations.
Sources et études
- Microbial Community and Metabolite Profiles of Kimchi — Journal of Ethnic Foods,
- Effect of Pasteurization on Probiotic Viability in Fermented Vegetables — Food Microbiology,
- Lactic Acid Bacteria and Fermentation Dynamics in Kimchi — LWT – Food Science and Technology,
- Anti-inflammatory Effects of Kimchi Consumption in Healthy Adults — Nutrients,
- Les aliments fermentés et leur place dans l’alimentation équilibrée — ANSES,
Cet article est fourni à titre informatif uniquement et ne constitue pas un avis médical. Consultez un professionnel de santé qualifié avant toute utilisation.